
How to Make Page Flip Effect
Try to page through this notebook. This natural effect can be totally made by SWF Quicker.
Series: Sothink SWF Quicker 2.2
Prepared work: download Sothink SWF Quicker -- http://www.sothink.com/product/swfquicker/download.htm
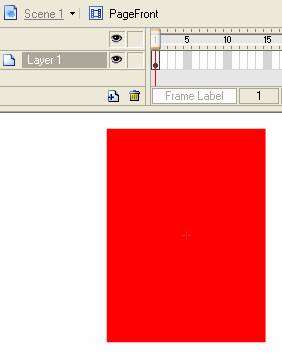
1. Launch SWF Quicker. Draw a rectangle on the canvas and set its size as width: 160; height: 215. It can be used to make transformative effect when you page through the note book. We name it "pagemask".
2. Select the rectangle and press F8 to convert it to movie clip named "PageFront". Duplicate it in library panel and name it "PageBack".
3. Select the instance of "PageFront" on the canvas and press F8 to convert it to movie clip. Give it a name "PageFlip".
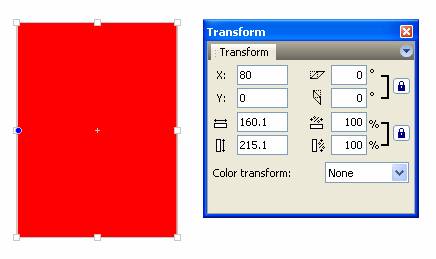
4. Enter into PageFlip editing mode. Adjust the instance of PageFront to the position (80, 0) and drag the center point to midpoint of left side as the blue point shown in following illustration. In SWF Quicker, the center point has automatic adsorption that means it positions automatically when it close to a point. Now the center point aligns to origin. The left side is the spine of a book when you page through.
TIP: The position of the center point, which is originally located in the center of a selected object, can be changed to another position. When you resize, rotate, or skew the object, all the operations will be based on the new position of the center point rather than the original location.
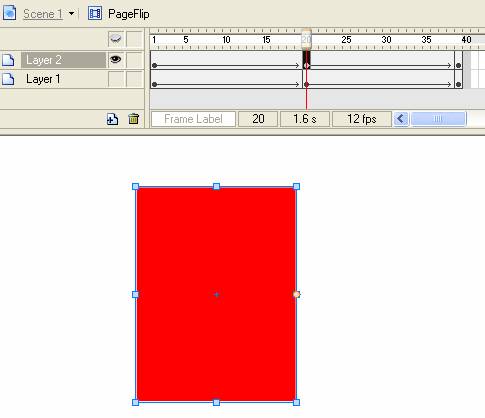
5. In timeline, insert a keyframe in frame 20 and 39 respectively. In frame 20, set the parameter of Skew Horizontally in Transform panel as -180. Please notice to unlock the geometric proportion of Skew Horizontally and Skew Vertically first. After that, create motion tween between frame 1 and frame 39.
The page flip effect has a rudiment now. Come to think of it, we seem meet another problem: what we should see is the front of the second page during frame 11-29, but we can only see the back of first page. That is all because we enter -180 as Skew Horizontally parameter. Now we need to make same page flip effect for "PageBack" and take corresponding frames to replace frame 11-29.
6. Click Eye Button to hide layer 1 in timeline. Insert a new layer, drag "PageBack" from library to canvas and set its position as (-80, 0), and then drag center point of "PageBack" to midpoint of right side. Align center point to origin.
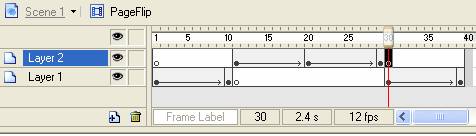
7. Set the parameter of Skew Horizontally as 180. Insert a keyframe in frame 20 and 39 respectively. In Frame 20, set the parameter of Skew Horizontally as 0 for "PageBack". Create motion tween between frame 1 and fame 39. Timeline is shown as follows:
Now, the flip effect of back page is done. It looks similar to Layer 1, but it displays the front page during frame 11-29. In the following, we will combine the two motion tween into one layer.
8. Insert a keyframe in frame 10, 11, 29, 30 of layer 1 and 2 respectively. In layer 1, convert frame 11-29 to blank keyframes. In layer 2, convert frame 1-10 and 30-39 to blank keyframes. Click Eye button of layer 1 to display this layer.
Tips: To convert keyframes to blank keyframes, you can first clear keyframes and insert blank keyframes to the right position.
9. Select frame 11-29 in layer 2 and right click them to select Cut frames in context menu. In Layer 1, select frame 11-29, right click them to select Paste frame. Now the two layers are combined into one layer.
10. In layer 2, insert a keyframe in frame 20 and 30. Input same ActionScript in frame 1 and 20 as follows:
| Code: |
| stop(); |
Input same ActionScript in the frame 11 and 30 as follows:
| Code: |
| this.swapDepths(-this.getDepth()); |
The above ActionScript means: when you page from front page to back page and from back page to front page, the Depth order need to be changed, for example, page 1 and 2 are in the first instance of PageFlip and page 3 and 4 are in the second instance of PageFlip. Page 1 is above page 3 while the front page is displayed that means the first PageFlip is above the second. In contrast, page 4 is above page 2 while the back page is displayed, in another word, the second PageFlip is above the first one.
11. Press Ctrl+F8 to create a new symbol and name it "PageBtn". Insert a keyframe in Hit frame. Drag "pagemask" from library to canvas and set its position as (0, 0).
12. Double-click "PageFlip" in library panel to return to PageFlip editing mode. Insert a new layer here; insert a keyframe in frame 2 and 20. Select frame 1, drag "PageBtn" to canvas and set its position as (80, 0), add following ActionScript in button.
| Code: |
| //"_global.curpage" is mean to write current page number. on(release) { var s:Number = _name.substr(4); if (_global.curpage==s) { play(); _global.curpage = Number(s)+2; } } |
Select frame 20 and drag "PageBtn" to canvas and set its position as (-80, 0). Add ActionScript in buttons as follows:
| Code: |
| on(release) { var s:Number = _name.substr(4); if (s == _global.curpage-2) { play(); _global.curpage = s; } } |
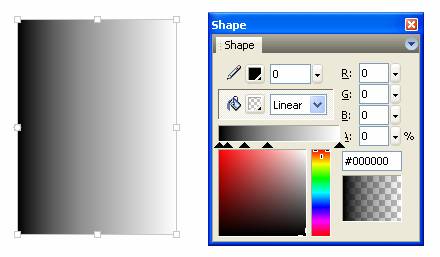
13. Here, Page flip effect is almost done. To make it perfect, we need to add a shadow when we page through the note book. Insert a layer and position it under the other layers. Duplicate "pagemask" in library panel and name it "pageshadow". Drag "pageshadow" to canvas and set its position as (80, 0), change its fill color as follows: color pointer: Black; Alpha value of each pointer are 100, 88, 65, 44, and 0 from left to right. Finally, drag the center pointer of "pageshadow" to midpoint of left side.
14. Insert a keyframe in frame 10, 11, 20, 29, 30 and 39 respectively.
In frame 10, set Width of "pageshadow" as 13, Alpha value as 50.
In frame 11, set Width as 13, Skew horizontally as 180, Alpha value as 50.
In frame 20, set Skew horizontally as 180.
In frame 29, set Width as 13, Skew horizontally as 180, Alpha value as 50.
In frame 30, set Width as 13, Alpha value as 50
Create motion tween between these frames.
15. Insert a keyframe in frame 2, 19, 21 and 38. Select the instance of these keyframes and set Alpha value as 80 for them in turn. Then convert frame 1, 20 and 39 to blank keyframes. After that, there is no shadow when page is lying.

16. Right-click "PageFlip" in library panel and select linkage, enter "page" as Identifier.
17. Enter into "PageFront" editing mode, delete rectangle "pagemask" in layer 1. Add following ActionScript:
| Code: |
| var s:Number = _parent._name.substr(4); this.attachMovie("page"+s,"page",1); //Automatically post the corresponding page, which has the same number in library as the serial number of instance name, in the movie clip. |
18. Do the same to "PageBack". Delete the rectangle in Layer 1 and add following ActionScript.
| Code: |
| var s:Number = _parent._name.substr(4); this.attachMovie("page"+(++s),"page",1); //Automatically post the corresponding page, which has the one bigger number in library than the serial number of instance name, in the movie clip. |
19. Because "PageFront" and "PageBack" are empty movie clips and they are difficult to position on the canvas, we need to create another new movie clip named "PageLocation" to do this task. Drag "pagemask" twice from library. Set the position of them as (80, 0) and (-80, 0), and then back to main movie, put "PageLocation" on the proper place which is the position note book displays in. Enter "pagelocation" as instance name of movie clip "PageLocation".
20. Now we will design each page with a size the same as "pagemask" and name them as page1, page2, page3… in library through command "linkage". I design totally 16 pages in this tutorial.
21. Insert a new layer and add ActionScript as follows:
| Code: |
| pagelocation._visible = false;//position movie clip to make it invisible; _global.curpage = 1; //place each page _root.attachMovie("page","page1",8); _root.attachMovie("page","page3",7); _root.attachMovie("page","page5",6); _root.attachMovie("page","page7",5); _root.attachMovie("page","page9",4); _root.attachMovie("page","page11",3); _root.attachMovie("page","page13",2); _root.attachMovie("page","page15",1); //it looks like a loose-leaf book if you enlarge the first and end pages; page1._xscale=page1._yscale=105; page15._xscale=page15._yscale=105; //position movie clip to evaluate for each page; page1._x = page3._x = page5._x = page7._x = page9._x = page11._x = page13._x = page15._x = pagelocation._x; page1._y = page3._y = page5._y = page7._y = page9._y = page11._y = page13._y = page15._y = pagelocation._y; |
That is the end of tutorial, press Ctrl+Enter to see your presentation.
See more details, you can download source files here simplePageflip.zip (89.61 KB) .
If you would like to learn Photoshop feel free to check tutorials at FinalDesign Studio.