
What Sothink DHTML Menu Can Do for You?
Cold Fusion Tutorial for Sothink DHTML Menu
Software used in this tutorial:
Cold Fusion MX
Sothink DHTML Menu
Microsoft Access
Basic assumptions:
You understand how to use/administer Cold Fusion. You understand MS Access (or another database application). You understand SQL.
You understand HTML and Javascript.
Intro:
This is a tutorial that I decided to write because I thought that it would be helpful for other Cold Fusion and Sothink DHTML Menu builders (and there was a request for a tutorial). This is not an extensive tutorial, but it will allow for you to get information from your database to your menu. It is up to you with what you do from there. This tutorial will follow the images and database that is provided in the tutorial zip file.
Step One: Creating the Menu
When you add menu condition, you may get a warning message in DHTML Menu. That's because the condition code is server-side code which can not be processed by the browser directly. The warning will not show when you add the menu to an asp page that is supported by server. You are disable the Auto-Refresh option by unchecking "Preview > Enable Auto-Refresh" to avoid seeing the warnings or add the JavaScript comment delimiters /* and */ to the Prefix as well as Suffix, for example:
Prefix:
/*
<CFQUERY Name= .....
*/
Suffix:
/*
</CFOUTPUT>
*/
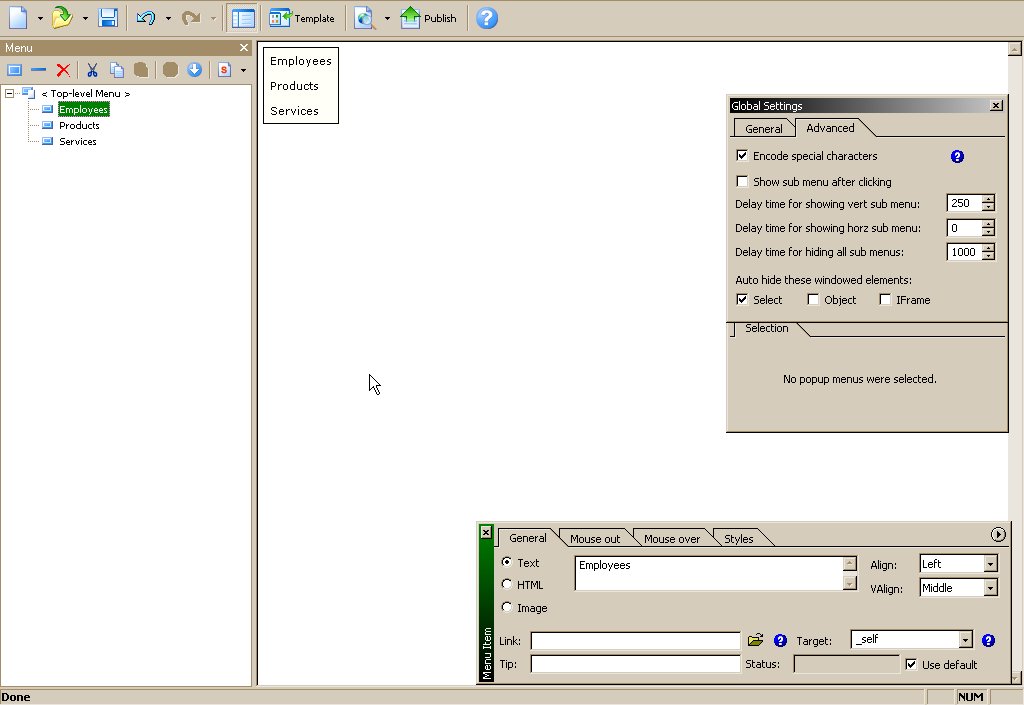
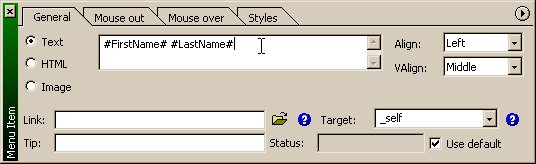
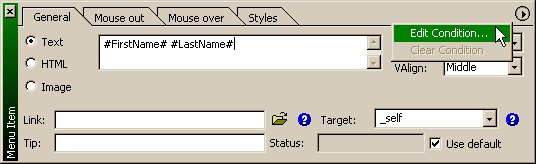
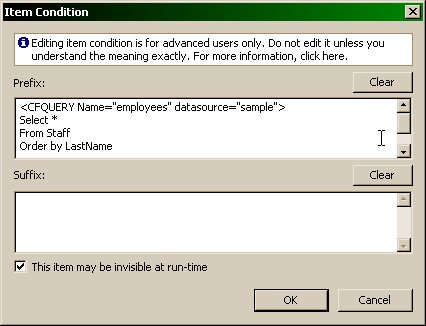
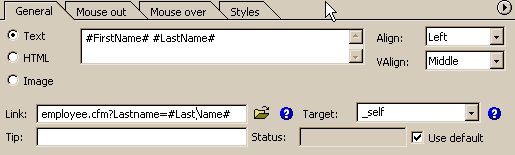
Create your menu (see Figure 1). Create a sub-menu which will hold the information that you want from the database. In the input field, choose "Text" and then put in the Cold Fusion code that will display what information you want in the menu (see Figure 2). In other words, this is the code that you would normally put to display a variable in Cold Fusion (after all, you're wanting to display info in the menu, right?). Click " Condition" in "Menu Item" (see Figure 3 & Figure 4). Put your <CFQUERY="whatever" datasource="sample"> and <CFOUTPUT QUERY="whatever"> tags within the "Prefix" window, and put your closing </CFOUTPUT> tag in the "Suffix" window (Figure 5 & Figure 6). Make sure the "This item may be invisible at run-time" check box is checked. Click OK. Put your links in the "Link" area how you would normally create a link that gets generated from the Cold Fusion language (Figure 7).
Repeat these steps until you have created your menu (Figure 8).
NOTE:
There are only three tables in this tutorial, but go through and create your menu however you need it.
Step Two: Publishing
NOTE:
I choose to create and call the menu by using <CFINCLUDE TEMPLATE="menu.cfm">. I do it this way so that I only have to change one file (menu.cfm) anytime I want to change the menu and have it updated on every page. You may want to do it differently.
Once you have your menu created, you will need to publish it.
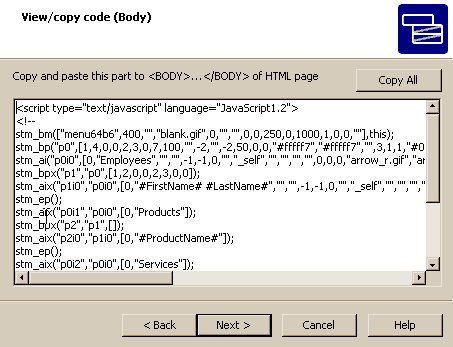
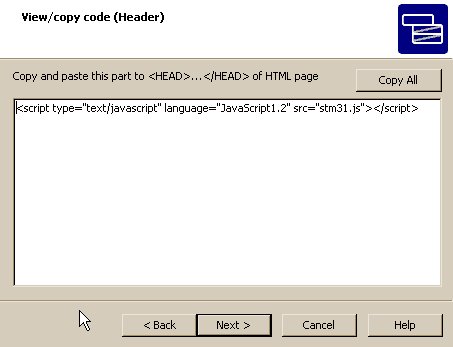
1. Create a BLANK page called "menu.cfm" (or whatever you want to call it). Use the "Publish > View/Copy Code" to view/copy the menu code (see Figure 9), and put that code into the "menu.cfm" page, then save the file. You will need to make sure that you put the code that goes in the HEAD tags (Figure10.jpg) into the page(s) that will use the menu, NOT the menu.cfm page (if you forget to put this in the page, the menu will not work).
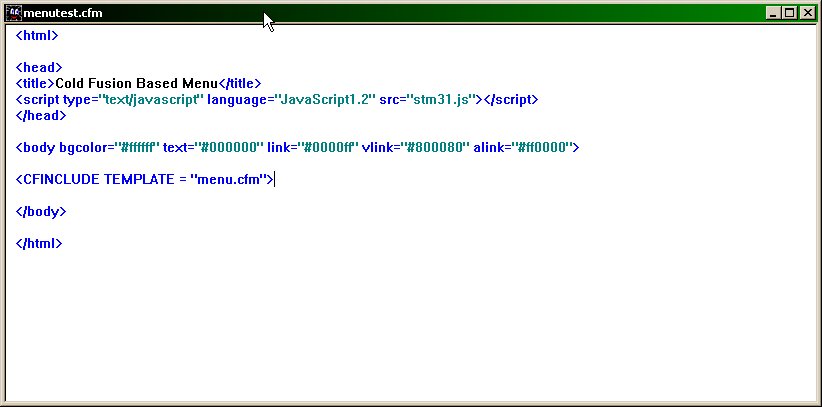
2. Use a <CFINCLUDE> to call the "menu.cfm" file wherever you want the menu to show. This way you will only have to edit the "menu.cfm" page anytime you want to change your menu (Figure 11).
NOTE:
Cold Fusion uses the # sign to display a variable (ie: #FirstName# to display a first name variable). However, the # sign is also placed in front of a color attribute (ie: #ffffff for the color "white"). This will create a critical error when the color attribute is between the <CFOUTPUT> and </CFOUTPUT> tags. As a result, you will need to go into the code and manually add another # in front of any color attribute (ie: ##ffffff) after the menu has been published.
Step Three: Test the Menu
Have/put everything in your Cold Fusion 'www' folder (ie: C:\Cold Fusion\www)... or wherever you run your tests from. Go into the Cold Fusion administration page and setup/connect your database.
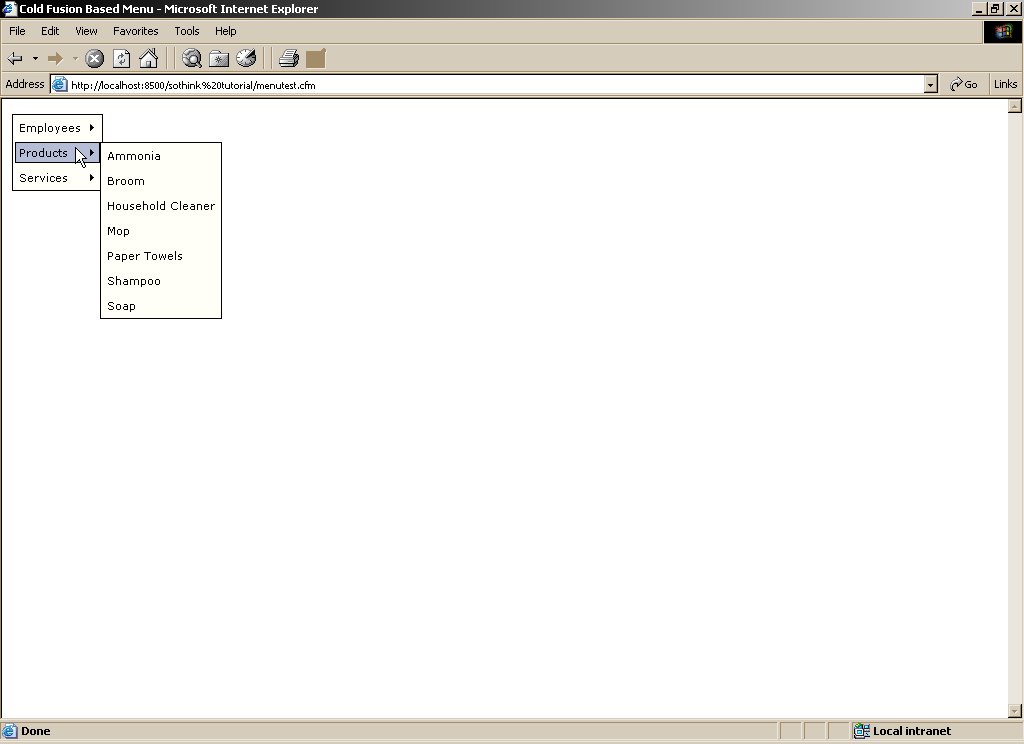
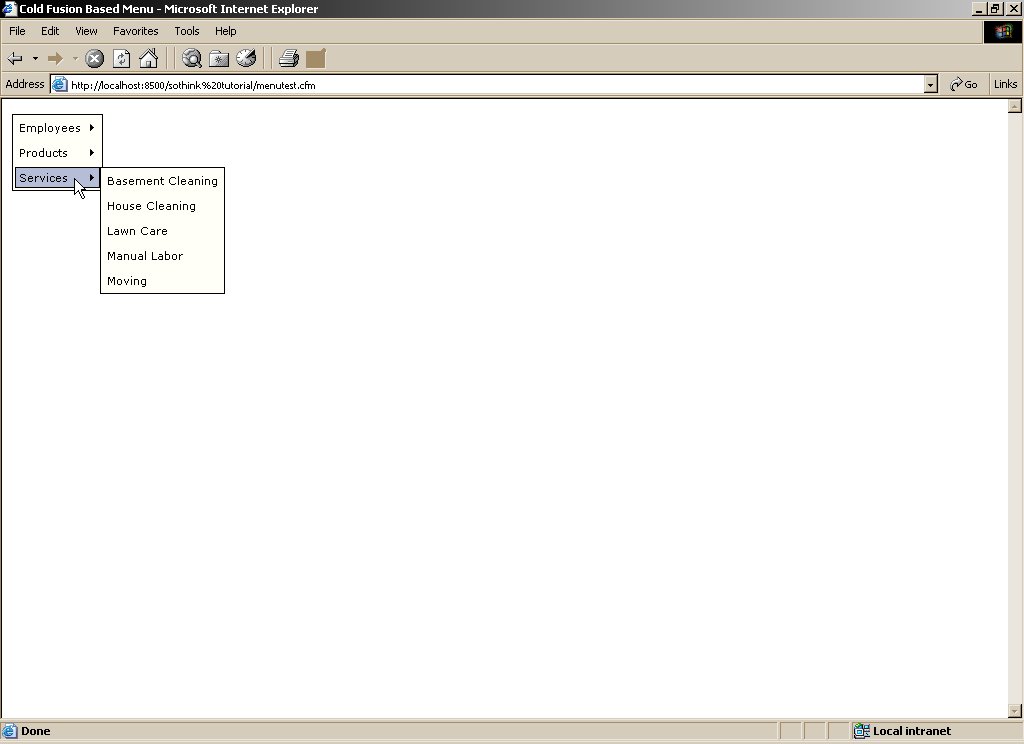
Test the menu. It should now generate information from the database and put it into a menu. It should look something like Figure 12, Figure 13, Figure 14.
General Drop Down Menu
Clone Drop Down Menu
Special Drop Down Menu